Do you like making quilt designs that use half square triangles? I don’t know about you, but this is one of my favorite blocks. Half square triangles are so versatile and are used in a myriad of quilting designs. Using the Magic 8 method, you will make 8 half square triangles at a time. Talk about your time saver, and easy. I am all about short cuts and making my life easier. If you haven’t utilized this method in the past, you’re in for a treat.
All you need are two squares of fabric, any size. The bigger your starting square the larger your finished half square triangle blocks. In this tutorial, I am starting with 10 inch squares.
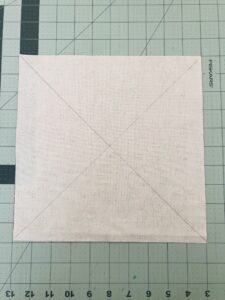
Step 1. On the back side of one of your squares, draw a line from corner to corner. Both directions to form an X.
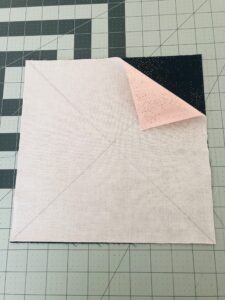
Step 2. Layer your fabrics, marked side up, right sides together and matching all edges. Add a couple of pins to hold your squares in place while sewing, if desired.
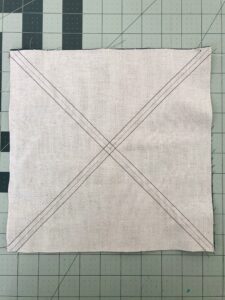
3. Stitch 1/4 inch away from the drawn line, on both sides.
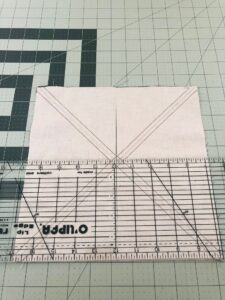
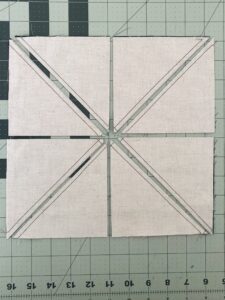
4. Using your ruler and rotary cutter, make a vertical and horizontal cut through the center of your block where the X intersects.

Step 4. Now cut diagonally, on both drawn lines, between the stitching.

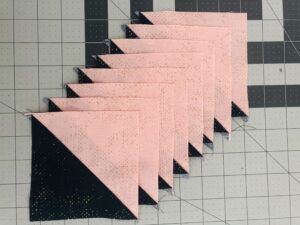
Step 5. And just like magic, you now have 8 triangle segments.
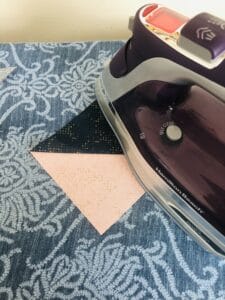
Step 6. Open the triangles and press to reveal your half square triangles. You can press to one side, or press your seams open.
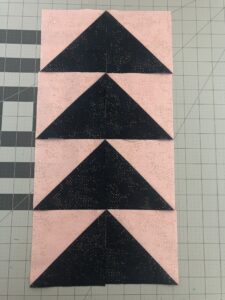
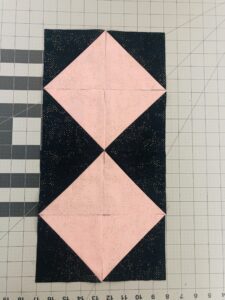
And that’s it. At this point you may want to trim your half square triangles so they are all the same size. But that’s all there is to it. I told you it would be simple. Now, here are a few examples of just how versatile this block is. I made these designs with only 8 squares, but imagine what you can do with many, many more. Go crazy!


![]()